SDF Building and Deploying Customization using WebStorm (PART 1)

Home » Blog » Customization & Integration » SDF Building and Deploying Customization using WebStorm (PART 1)
 alphabold

This blog is the first Part of the series which will help you to set up WebStorm on your machine and connect NetSuite with WebStorm for Customization in NetSuite.
In this blog, we will discuss two things related to WebStorm:
SuiteCloud IDE plug-in for WebStorm is an integrated development environment (IDE) packaged for NetSuite stage development. You can download SuiteCloud IDE plug-in for WebStorm as a plug-in installation, develop SDF projects, and deploy them to your account You can perform the following tasks using SDF project in the WebStorm plug-in:
Follow steps below to download WebStorm:
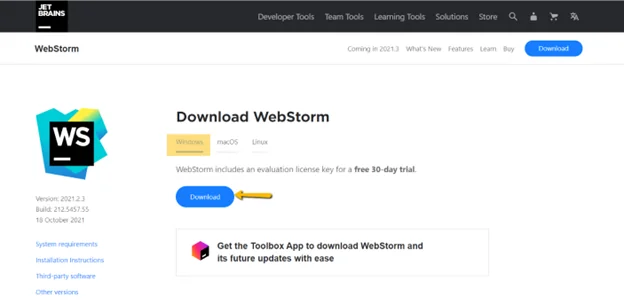
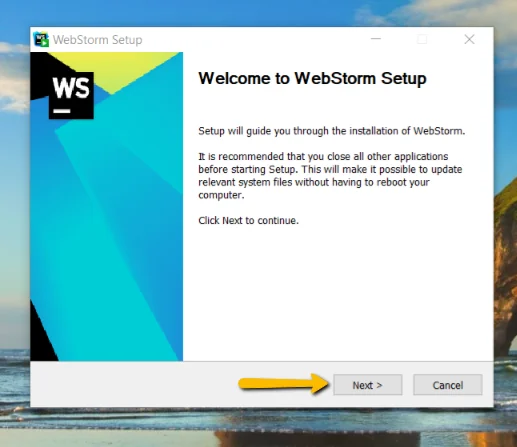
NOTE: “While launching WebStorm a popup appears with question for licensing so either you provide your license credentials or login with a 30-day free trial”.
Ready to customize your NetSuite solution? Partner with NetSuite Customization experts for a seamless experience.
Request a ConsultationIf you add the suiteCloud IDE update to WebStorm, you can easily download the latest version of the IDE that is compatible with your NetSuite account.
Here are the steps to add SuiteCloud IDE update site for WebStorm:
1. First, launch WebStorm.
2. Next, depending on your running system, do one of the following:
3. Then, select Plugins, and click settings option. Select Manage Plugin Repositories
4. In the Custom Plugin Repositories window, click + and enter the following:
5. After that, select ‘OK.’
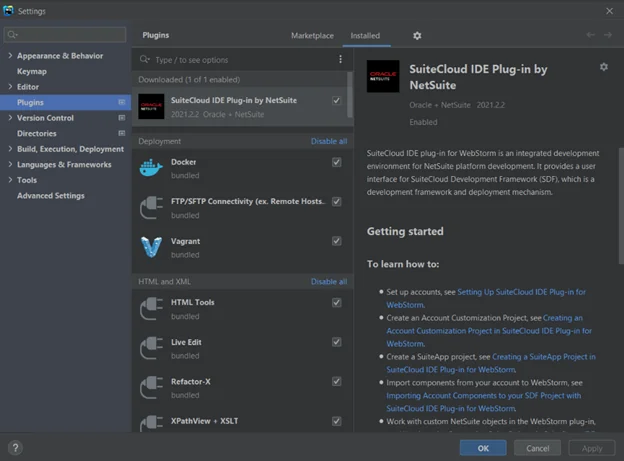
6. Type NetSuite’s Suite Cloud IDE Plug-in and then, click ‘Install.’
7. Lastly, ‘Restart’ WebStorm (from main menu, select File > Manage IDE setting > Restore Default Setting > click Restore and Restart). The IDE will be restarted with default configuration.
Here is the image to understand point 7:
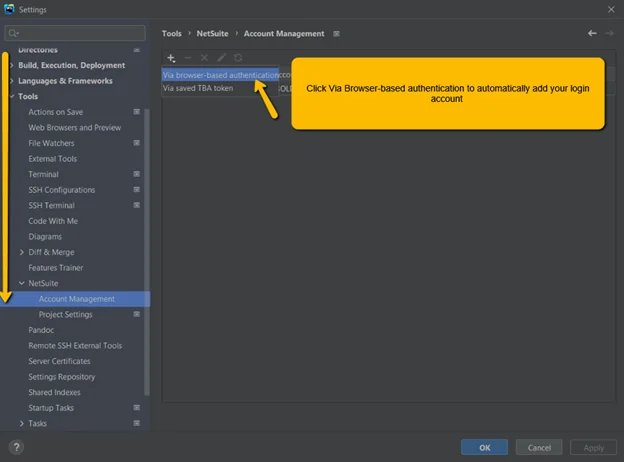
Use the following steps to add an account.
Follow these steps to add an account:
1. Depending on your running system, do one of the following in WebStorm:
2. Click +, and from the dropdown list, select one of the following options:
3. After authenticating your role, it adds your account to the account table.
Read More: SDF Building and Deployment Customization using WebStorm (Part 2)

Streamline your ERP selection process with our comprehensive checklist, ensuring you make informed decisions for your business's future success.
Learn more
Here are the steps to modify an account in SuiteCloud IDE Plug-in for WebStorm:
1. First, depending on your running system, do one of the following on WebStorm:
2. Then, from the account table, select the account-role combination you want to update, and click .
3. Finally, in the prompted window, modify the information that you want to update and click ‘OK.’
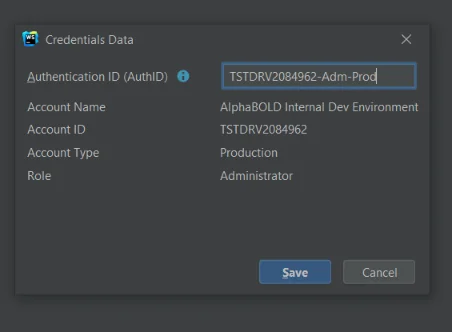
After fulfilling the above requirements, CONGRATULATIONS, now your WebStorm is installed and connected to NetSuite.
Read More: C-Level Cheat Sheet: Why Choose NetSuite Implementation
Leverage NetSuite Customization and Integration services for expert guidance and support. Reach out to us for a tailored approach to your NetSuite setup!
Request a ConsultationHope now you know what is SuiteCloud IDE plug-in for WebStorm and how to connect with NetSuite. In the next blog of this series, we will discuss how to create scripts and bundles using WebStorm. So, for more information, don’t forget to check out the next blog of this series.


